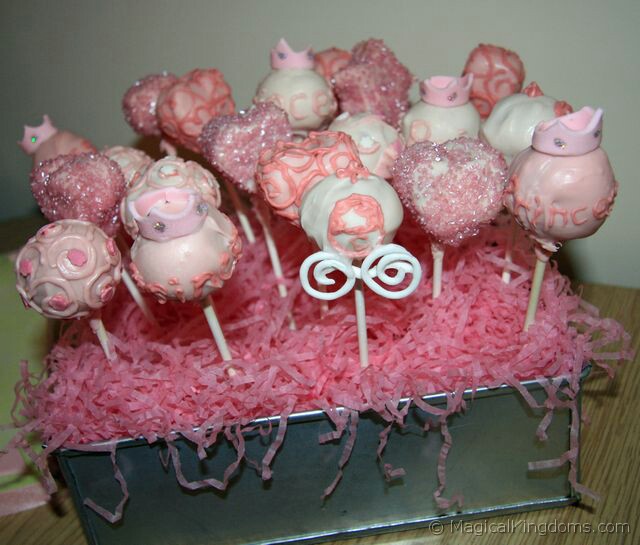
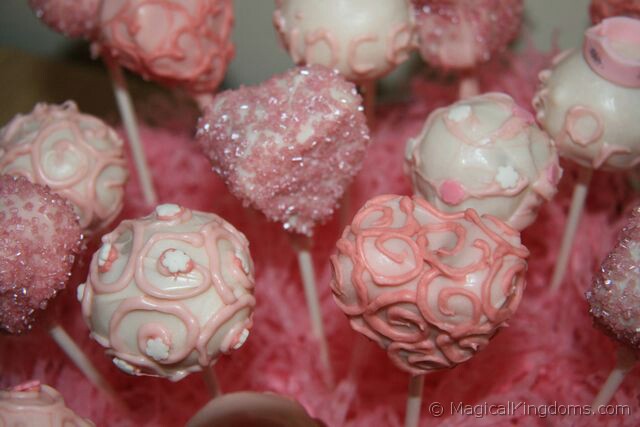
Cake pops are the “in thing” at the moment, and are very popular for birthdays, baby showers, and gifts in general. Here are some I made recently for my daughter’s Disney princess themed birthday party.
For the cake ball mixture I followed Bakerella’s recipe, which is for 48 cake pops, but halved the ingredient quantities to just make 24 pops.
I baked a 6″ round cake and used most of it. Plus about 7 oz frosting (buttercream). You can find the recipe for 48 pops by doing a simple Google search for “Bakerella cake pop recipe.”
Crumble the cake, using a food processor or by hand. Then mix well with the frosting.
Roll the mixture into balls, I did mine a bit less than 1 inch in diameter, and place on a baking sheet covered with wax paper.
Place the balls into the freezer for no more than 15 minutes, then put them in the refrigerator until you’re ready to use them.
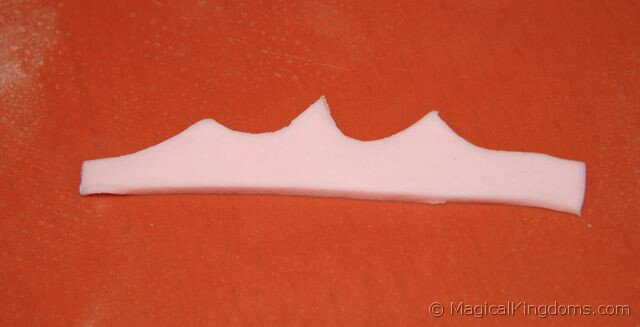
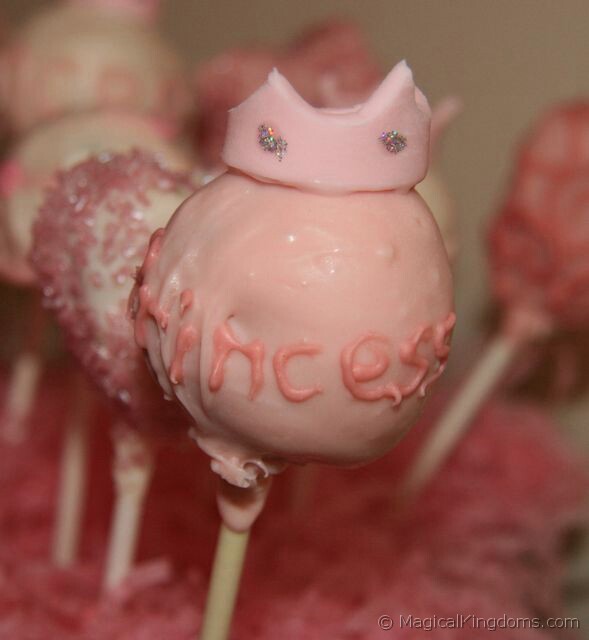
For the crowns, I rolled out some pink rolled fondant (sugarpaste) and cut it into a crown shape. Roll it round into a crown, then leave it to harden. Once it’s dry, you can stick some edible glitter on using sugar glue or melted candy melts.
To cover the cake pops you’ll need candy melts, which come in a variety of different colors. I used white candy melts and mixed in pink coloring, adding more to make deeper shades of pink as I went along. You’ll need approximately 1 oz of melts for each cake pop you’re going to make.
Follow the instructions on the candy melts packaging to melt them. Use a deep a bowl as possible to make it easier for dipping.
Just take a couple of cake balls out of the refrigerator at a time so that they don’t get too warm.
Get a lollipop stick and dip the end into the melted candy melts, then insert it into a cake ball, about half way.
Dip the entire cake pop into the bowl of candy coating, and remove in one go, without stirring if possible. The whole of the ball needs to be covered. If the coating is too thick, add a few drops of vegetable oil or shortening. Let any excess coating fall off into the bowl. Make sure that the coating has reached the lollipop stick so that the cake ball is secure.
Place each cake pop stick into a styrofoam (polystyrene) block to dry.
Now it’s time to decorate!
For the princess pops I colored some candy melt mixture a deeper shade of pink and put it into a piping bag. I then piped the word “princess” around the cake ball, and stuck one of the crowns I’d made earlier on top.
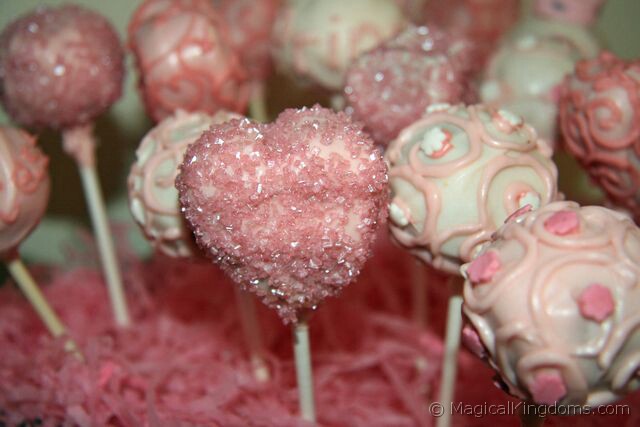
For the sparkly hearts, I made the cake balls into heart shapes. After rolling the mixture into a ball, I pushed it into a heart shaped cutter, then placed in the freezer/refrigerator as before. Straight after dipping in the melted candy I dipped into a plate of sprinkles (you need to work very quick here!)
For the swirly cake pops I colored some candy melt mixture a deeper shade of pink and piped it onto each cake pop. On some I stuck little sugar flower shapes as I went along, before the swirls dried.
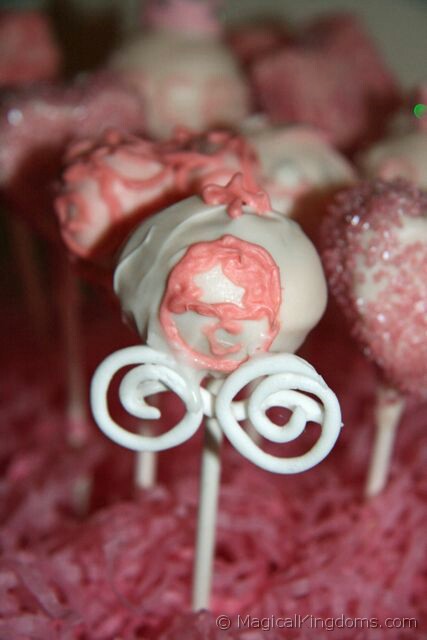
Now for the Cinderella’s coach cake pops!
The wheels need to be done at least a day in advance. Using modeling paste (rolled fondant mixed with CMC powder or gum tragacanth), or Mexican paste / flower paste, you need to roll out a long thin sausage of paste. Shape it round into wheel shapes and leave to dry.
You also need to roll out a curved line of paste to act as the part that holds the wheels together.
Once completely dry, stick the wheel support onto the back of each wheel so it holds them together (use sugar glue, royal icing or melted candy melts). Allow that to dry.
The trickiest bit is to get the wheels stuck onto the cake pop! I found royal icing worked best, although you can use melted candy melts too. You’ll need to support the wheels against the cake pop until it’s dried completely.
Then, using a piping bag, pipe candy melt mixture on to make the coach door and top.
To display them, I used a square cake pan, placed styrofoam blocks in the bottom, filled with shredded tissue paper and pushed the sticks into the styrofoam blocks.
The candy melts went down a storm at my daughter’s party and were a huge hit. It was my first attempt at making them, and although not perfect, I don’t think anyone noticed!
If you’re interested in learning more on how to make cake pops, get tips and see lots of designs, I’d highly recommend the Bakerella book-
Cake Pops: Tips, Tricks, and Recipes for More Than 40 Irresistible Mini Treats (US)
(UK link)

I’m in the process of making these for my granddaughters birthday – she is all about princesses right now. Once they are dipped and decorated I plan to store in the refrigerator. How well do they keep and how long can I keep them refrigerated before serving them?
thanks so much – these are great
I’m not 100% sure as ours were eaten the day after. I’d guess a few days to 1 week. Good luck with them and Happy Birthday to your Granddaughter!
I just read in a magazine they can be refrigerated for up to 1 week but frozen for up to 3 months. If you freeze them it says to take them out of the freezer AT LEAST 30 min. Prior.
I’m having a first birthday party brunch for my baby girl and am making cake pops for the first time myself. Yours are cute, love the little crowns.